
How to Install Vinyl Plank Flooring (Step-by-Step DIY Guide)
Vinyl plank flooring is one of the most popular DIY flooring choices, and for good reason. It looks like wood, handles water better than laminate, and most click-lock planks float over the subfloor with no glue or nails. A careful beginner can do a bedroom in a weekend.
This guide walks you through how to install vinyl plank flooring step by step: prepping the subfloor, planning the layout, laying and cutting the planks, and finishing the edges. Always check your product’s installation guide too, since specs vary by brand.
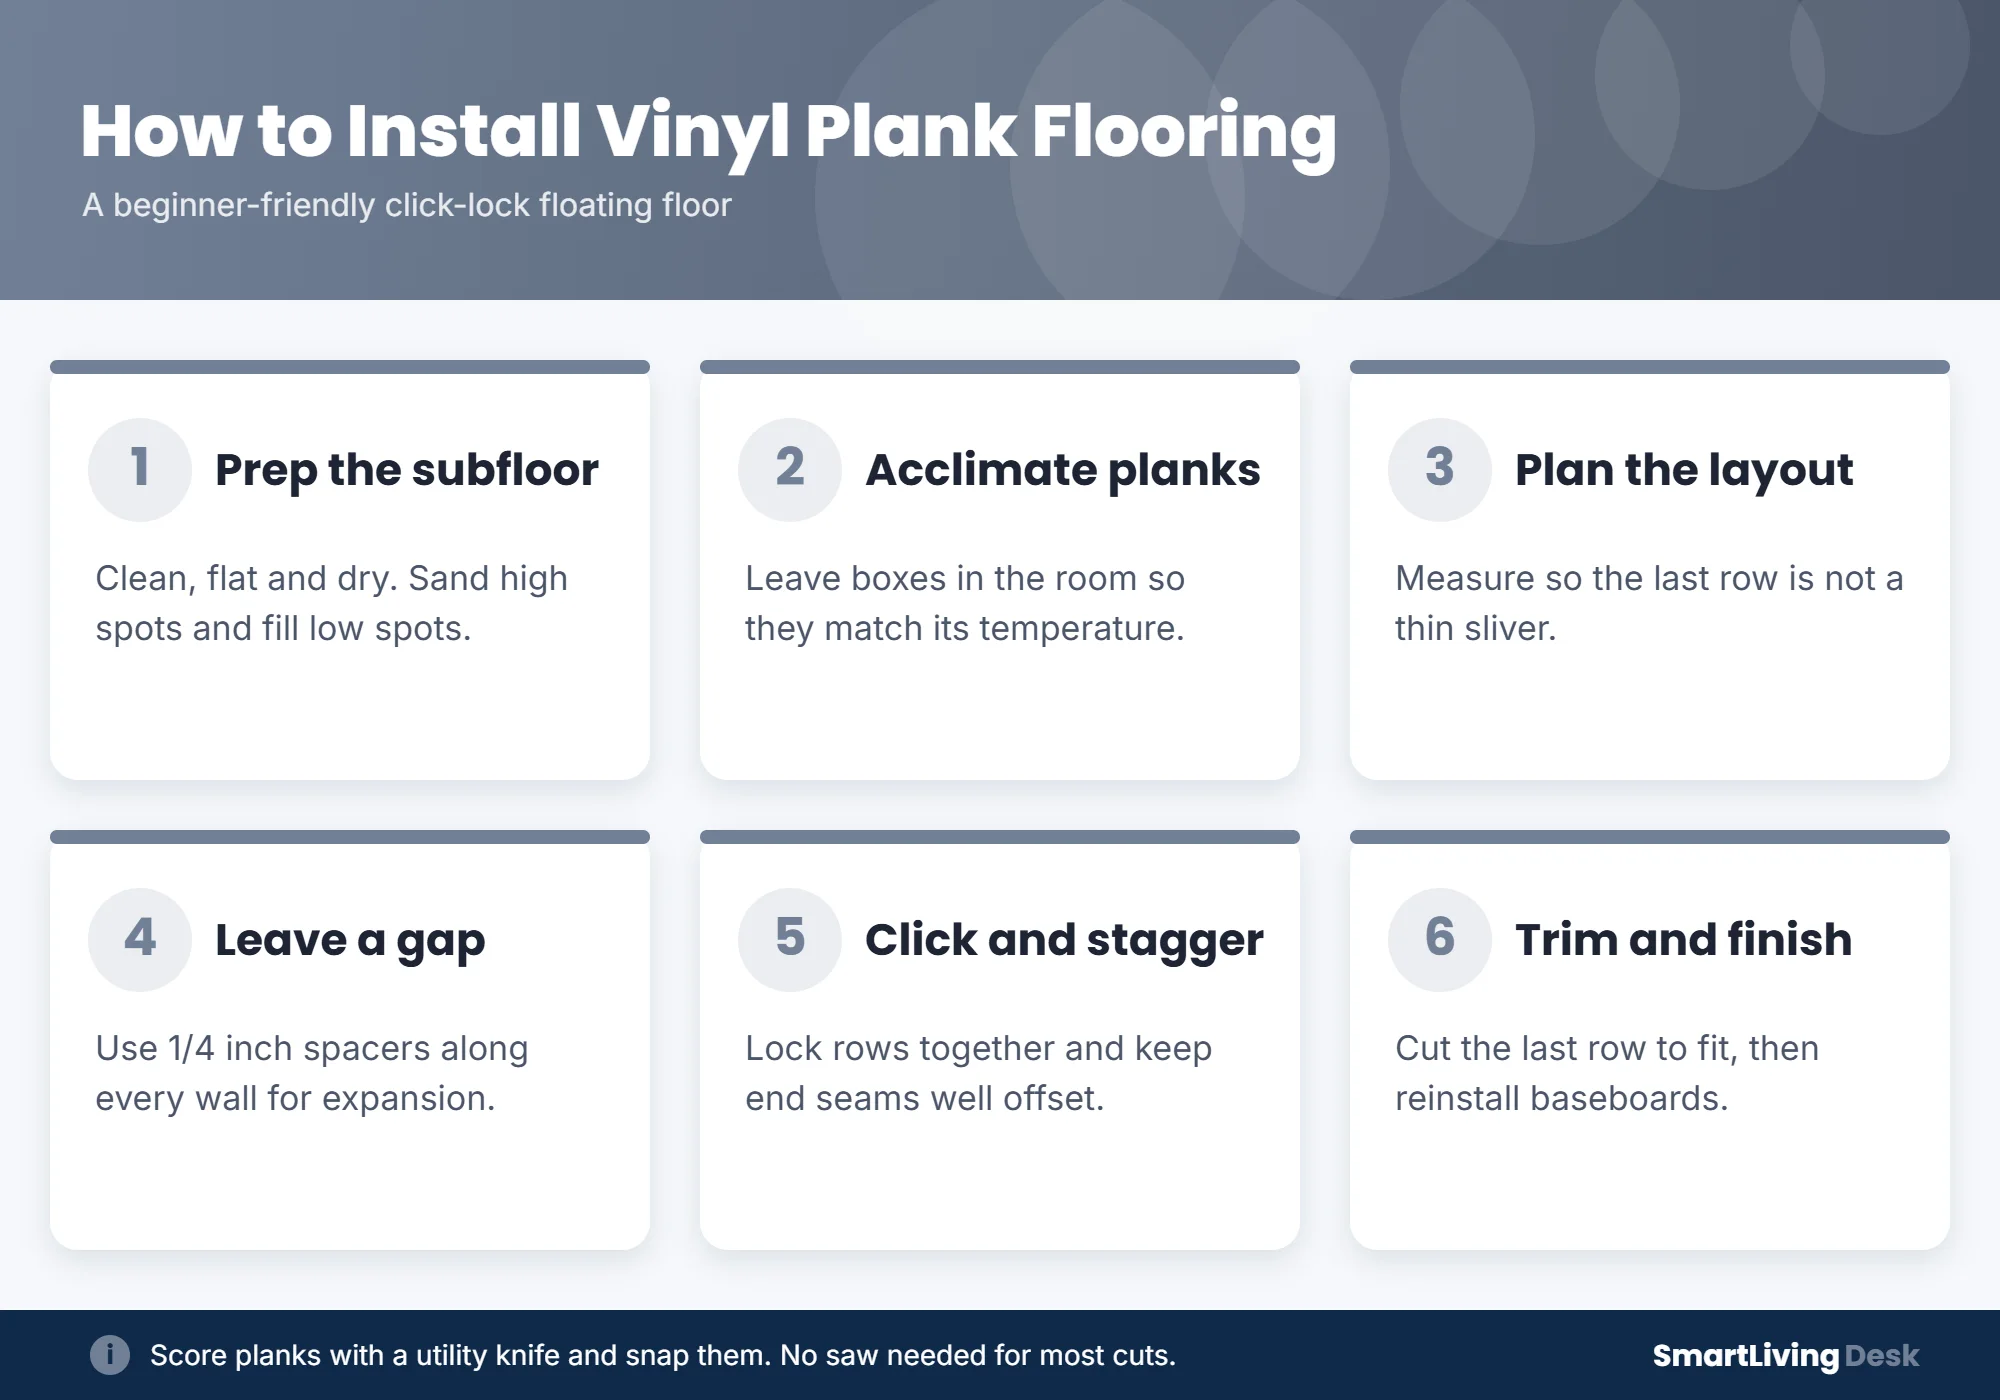
Quick answer: To install vinyl plank flooring, make sure the subfloor is clean, dry and flat, remove the baseboards, and let the planks adjust to the room. Plan your layout so the last row is not too narrow. Start along one wall with the groove facing away and a 1/4 inch expansion gap at the walls. Click each plank into the previous one, stagger the end seams, and cut planks by scoring with a utility knife and snapping. Trim the last row to fit, then reinstall the baseboards to cover the gap.
Tools and Materials
- Vinyl plank flooring (buy about 10 percent extra for cuts)
- Underlayment, if your planks do not have one attached
- Utility knife and speed square
- Tape measure and pencil
- Tapping block and rubber mallet
- Spacers (1/4 inch)
- Pry bar and putty knife for baseboards
- Jamb saw or handsaw for door frames
- Knee pads
Step 1: Prep the Subfloor
Vinyl planks are thin, so every bump shows through. Clean the floor, then check it with a long level. MSI’s installation guide says subfloors must be level within 1/8 inch over 6 feet. Bob Vila recommends sanding high spots and filling cracks and low spots with patching compound. Over concrete, make sure the slab is dry; some brands require a moisture test or vapor barrier.
Step 2: Remove Baseboards and Undercut Door Jambs
Score the caulk along the baseboards, then gently pry them off. Number the pieces on the back so they go back in the same spots. Lay a plank upside down next to each door frame and use a jamb saw to cut the bottom of the frame so the new floor can slide under it.
Step 3: Acclimate the Planks
Bring the boxes into the room. Bob Vila suggests letting them sit for about 2 days so they match the room’s temperature and humidity. Some rigid core products say acclimation is only needed if they were stored in very hot or cold conditions, so follow your brand’s directions.
Step 4: Plan Your Layout
Planks usually run parallel to the longest wall or toward the main light source. Measure the room width and divide by the plank width. If the last row would be less than about 2 inches wide, trim the first row narrower so both edge rows are similar. Lay out a few rows loose to see how the colors and patterns mix, pulling planks from several boxes.
Step 5: Install the First Row
- If needed, roll out underlayment and tape the seams. Skip this if your planks have a pad attached.
- Place spacers along the starting wall.
- Set the first plank in a corner with the groove side facing away from the wall (MSI says to start in the left corner).
- Connect the next plank end-to-end by angling it in and pressing it down.
- Cut the last plank in the row to fit, keeping the 1/4 inch gap at the wall.

Step 6: Lay the Rest of the Rows
Start each new row with a different length so the end seams do not line up. MSI recommends offsetting end joints by at least 10 inches, and Bob Vila suggests starting each row with a piece at least 6 inches shorter than the row before. Angle the long edge of each plank into the previous row, press it flat, and tap it snug with a tapping block and mallet. Never hit the plank edge directly.
How to Cut Vinyl Plank Flooring
Most cuts are easy. Measure, mark, and score the top of the plank with a utility knife along a speed square. Then bend the plank at the line and it will snap cleanly. Cut through the backing with the knife if needed. For curved cuts around pipes or vents, use a jigsaw or tin snips, or make a cardboard template first.

Step 7: Finish the Last Row
Measure the gap to the wall at a few points, subtract the 1/4 inch expansion gap, and rip the planks lengthwise to that width. Use a pull bar to lock the last row in tight. Remove the spacers once everything is in place.
Step 8: Reinstall Trim
Put the baseboards back, nailing them into the wall, not the floor. The floor needs to move slightly, so the trim should only cover the gap, not pin the planks. Add transition strips at doorways and where the vinyl meets other flooring.
Common Mistakes to Avoid
- Skipping subfloor prep, which leads to soft spots and seams that pop apart.
- Forgetting the expansion gap, which can make the floor buckle.
- Lining up end seams in a row, which looks fake and weakens the floor.
- Nailing baseboards or heavy cabinets through the planks.
- Using planks from only one box, so patterns repeat in one spot.
Keeping your new floor clean is easy. A damp microfiber mop and a pH-neutral cleaner work well, similar to the routine in our guide on how to clean hardwood floors. For tile areas, see how to clean grout.
Frequently Asked Questions
Can I install vinyl plank flooring over tile?
Often yes, if the tile is flat and solid and the grout lines are filled so they do not show through. Check your product’s guidelines.
Do I need underlayment for vinyl plank flooring?
Not if your planks have an attached pad. Otherwise, use the underlayment recommended by the manufacturer.
Which direction should vinyl planks run?
Usually parallel to the longest wall or toward the main window, which makes the room look larger.
How long does it take to install vinyl plank flooring?
A typical bedroom takes a beginner about a day, plus prep time for baseboards and the subfloor.
Can vinyl plank go in bathrooms and kitchens?
Yes, most vinyl plank is water-resistant, which makes it a popular choice for wet areas. Follow the brand’s guidance for sealing edges in bathrooms.
The Bottom Line
Installing vinyl plank flooring comes down to good prep and patience. Get the subfloor flat, plan the layout, leave a 1/4 inch gap at the walls, click the rows together with staggered seams, and score and snap your cuts. Finish with baseboards and transitions, and you will have a durable floor that looks like wood for a fraction of the cost.
Installation requirements vary by brand. Always read and follow your flooring manufacturer’s instructions to protect your warranty.